The filter feature in SmartCoach allows you to find the parts of the game that are relevant to you quickly and efficiently. Filters can be created by publishing a Team analysis on SmartCoach, having access to our AI-filters, or uploading an XML file with game events to the recording.
If filters are available to you in a recording, the video player will show a “Filter” icon. Click the filter to see which filters you can apply to the recording. Click the filters you want to use, and click “Apply” to start filtering.
The video will now skip to the next moment that is applicable through the filters you have selected, and will open a timeline with the filters.
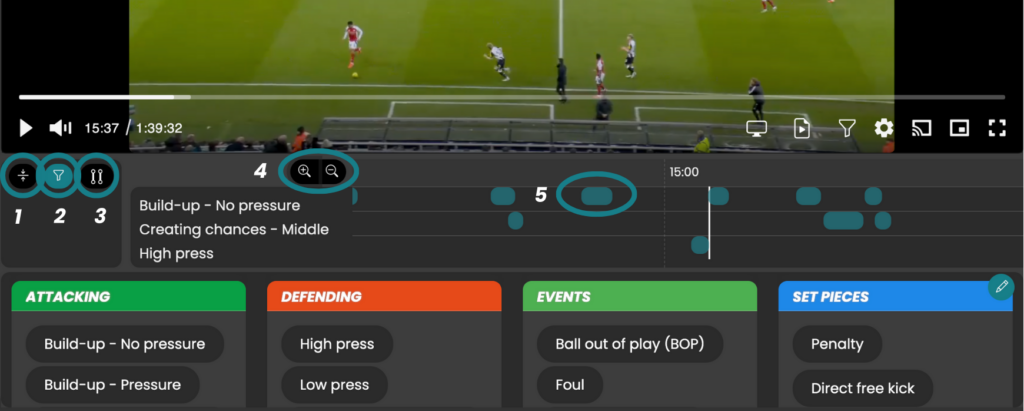
This timeline will show you the moments in the recording that these filters are active. This interface has a few more buttons that give you some extra flexibility in using the filters:
- Collapse timeline: The timeline will be reduced in size to show only one row in the timeline.
- (De-)activate filter: Temporarily (de-)activate the filter. This can come in handy when the video skips ahead but there is an interesting moment coming just outside the filter range.
- Combine/Separate filter: If you have selected multiple filters, you can choose to combine the filters to only show the parts of the video where ALL of the selected filters are active. If separated, all parts of the video are shown where at least one of the filters is active.
- Zoom in/out: Zoom in or out to get more detail or more overview on the timeline.
- Filter active: You can click on every active part of the filter to go directly to that clip.